You can significantly extend the life of your garage door by following our maintenance checklist. However, despite regular care, issues can arise that require attention. Knowing whether a repair is something you can handle yourself or if you need to call in the pros is essential for maintaining your door's longevity and preventing further damage.
Understanding your specific needs and your skill set will not only lengthen your door's lifespan, but also help avoid costly repairs down the road.
#1. Decorative Hardware
Adding decorative hardware is a simple yet impactful way to enhance the look of your existing garage door. Once you've chosen the right design, installation is straightforward. You can select from various hardware options based on your personal style and preference.
If your current decorative hardware is showing signs of wear—such as loosening or rusting—it's time for a refresh. Regular maintenance includes tightening your hardware to prevent it from falling off unexpectedly.
For a hardware replacement, gather these tools:
- Tape Measure
- Level
- Pencil
- Drill
Position your hardware where desired, marking each drill hole with a pencil. Use a level to ensure accuracy and alignment. After marking, drill your holes and secure the hardware in place. Great news: garage door hardware repair or replacement is definitely a DIY-friendly task!
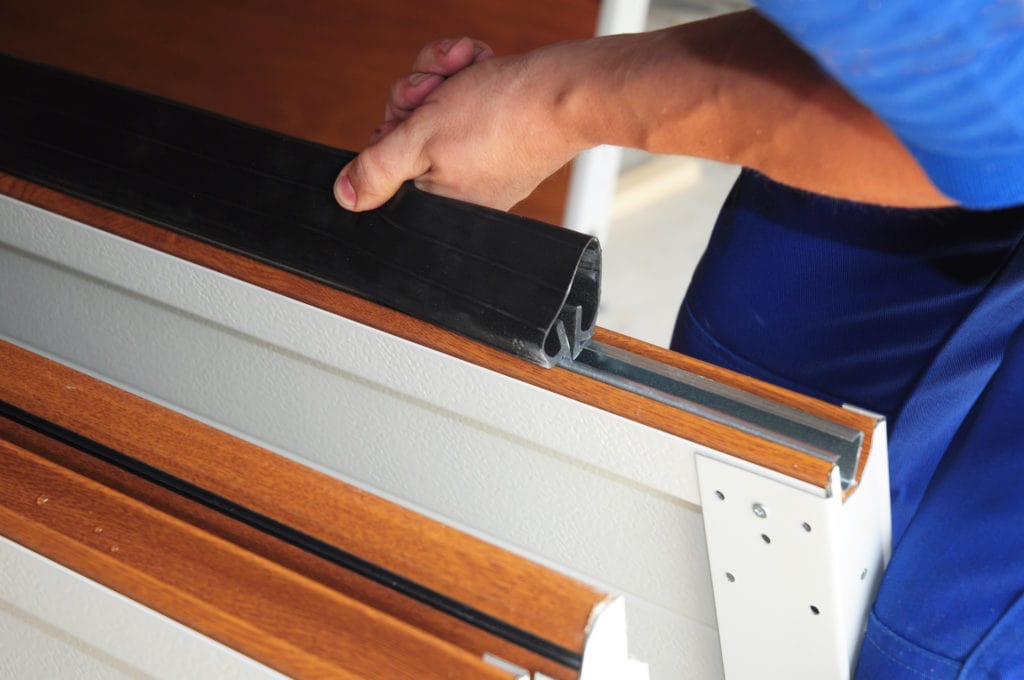
#2. Weather Stripping or Seals
Next, let’s talk about how to repair garage door weather stripping. Over time, these components often need attention. It’s critical to have the right information and tools when performing a repair or replacement. Weather stripping adds an extra layer of protection, helping to retain heat inside your garage during colder months.
Signs that it’s time for a replacement include:
- A noticeable difference in temperature in your garage compared to your thermostat reading.
- Water seeping under the bottom of your door.
- Light visible around the edges of your garage door.
- Visible cracks or warping in the weather stripping.
- Your weather stripping feels stiff and brittle instead of flexible.
If you're replacing the bottom seal, you'll need to remove the old weather stripping first. While doing so, it’s a great opportunity to clean the track, as dirt and debris tend to accumulate over time. Cleaning the track will extend the life of the new weather stripping.
When applying the new seal, use dish soap to lubricate it for easier installation along the bottom of your garage door. There are several types of garage door weather stripping available, so be sure to match yours to the correct option. Regardless of the type, this is a job you can tackle on your own.
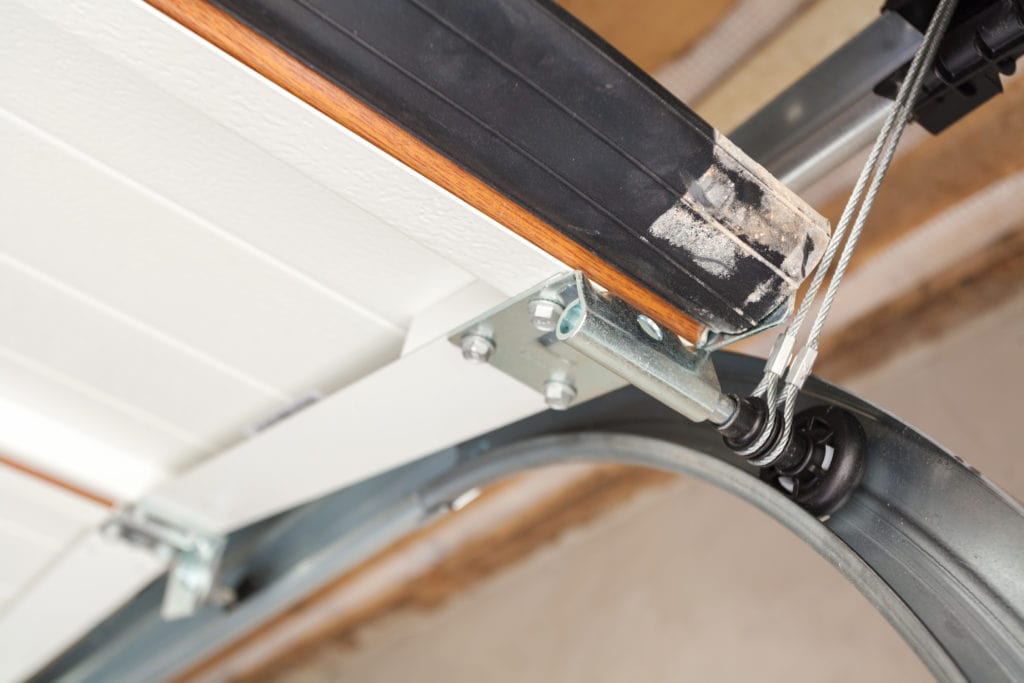
#3. Garage Door Track
Certain parts of your garage door track might be contributing to problems with the entire door. Knowing what kind of track you have will help you diagnose issues and find solutions. To keep your garage door track in good condition, lubricate it at least twice a year. Before lubrication, inspect the rollers, hinges, and opener chain.
It’s also important to use the right degreaser. Silicone spray or white lithium grease is recommended over standard products like WD-40®.
Look out for these signs that your garage door track needs attention:
- Your door doesn't close fully or moves unevenly.
- There's increased noise when the door operates.
- Your garage door is sagging or warping.
- The door hesitates to open or takes longer to open.
- Rust or corrosion appears on your door track.
Installing garage door tracks yourself can be challenging and labor-intensive. Depending on your experience, you may decide to do it yourself, but for the best results, it’s best to bring in a professional.
#4. Garage Door Sensors
One common reason your garage door might malfunction is a problem with your garage door sensors. If the sensors can't align properly, your door may remain open or behave erratically when you try to open or close it. Ensuring your sensors are working correctly should be a top priority, as they are designed to prevent accidents, such as the door closing on something or someone.
Sensors rely on photo-eyes to detect obstructions in their path. If your door fails to close without anything blocking it, it’s likely time for a sensor adjustment or replacement. Start by cleaning and realigning the sensors to rule out dirt or debris as the culprit. If the issue persists, the sensors may need to be replaced.
Luckily, replacing garage door sensors is another DIY-friendly repair. You can purchase a new set at your local home improvement store or online.
#5. Garage Door Springs
Your garage door springs play a critical role in its operation. If you're considering replacing them yourself, think again. These springs are under high tension, and mishandling them can result in serious damage or injury. If something is wrong with your springs, you might notice increased noise when opening or closing the door, or the door might close too quickly. Address these issues promptly, as springs help regulate the door’s movement to avoid accidents.
Even if just one spring isn’t functioning properly, it’s important to address it immediately. While a single spring can technically allow the door to operate, it puts excessive strain on the rest of the system.
#6. Automatic Openers
There are many potential reasons why your garage door isn’t functioning properly. While mechanical issues are common, another possibility is a malfunctioning automatic opener. Fortunately, fixing your automatic opener is a relatively simple DIY project. Doing so not only makes your life more convenient but also enhances the security of your home.
Without a reliable opener, it becomes easier for unauthorized individuals to access your home via the garage. In fact, 9% of home break-ins occur through the garage door.
To replace your opener, follow the instructions provided with your new unit. Test it by mounting it temporarily on a ladder at the appropriate height. Once you confirm it works correctly, install it permanently on the header bracket, ideally with the door open for easier access.
How to Prevent Garage Door-Related Accidents
While garage doors and DIY repairs can pose risks, there are ways to minimize the chances of property damage or injury:
- Regularly test the door’s safety sensors using an inanimate object.
- Check the door’s balance by disconnecting the opener and manually lifting it halfway.
- Keep children safe by using keypads and securing remote controls out of reach.
- Ensure all bolts securing the door to the building are tightened.
- Verify the emergency release mechanism is securely closed.
This article was originally published on June 30th, 2020, and was updated on November 29th, 2023.
Closed End Blind Rivets,Closed End Pop Rivets,Closed End Aluminum Rivets,Aluminum Closed End Pop Rivets
TIANCHANG FASTENER SYSTEM CO..LTD , https://www.toprivet.com