First, start by checking the original waterproofing condition inside the house. Look for any accumulated water in the caisson pit, inspect corners for signs of water leakage, and ask if there are any complaints from the neighbors below. This step is crucial. If you notice any issues, contact the property management immediately.
Next, follow the design plan to handle the basic structure. This includes removing walls, windows, and stairs as required by the layout. Ensure that all structural changes are approved and done safely.
Then, proceed with the red brick masonry work. This helps refine the spatial layout, making it more functional and aesthetically pleasing. Pay attention to the alignment and stability of the bricks during construction.
After that, move on to the plumbing renovation. Properly arrange the use of each space, especially in areas like the bathroom and kitchen. Since this is a hidden project, its quality will directly affect your future living experience.
When it comes to electrical sockets, don’t be afraid of having too many. It’s better to have extra than not enough. Keep strong and weak power lines at least 20 cm apart to avoid interference and ensure safety.
Now, focus on the waterproofing of the floor, walls, bathrooms, and kitchens. After applying waterproofing layers, tile installation follows. Be sure to check for any hollow drumming under the tiles, as this can lead to future problems.
Once the flooring is ready, the carpenter will step in. They’ll install custom-made furniture such as doors, door panels, wall backgrounds, and ceilings. Make sure to communicate clearly with them to match your expectations.
Then, the painter can begin their work. The walls need to be sanded, primed, and painted. This stage requires a clean and dust-free environment, as even small particles can ruin the finish. Keep the area well-ventilated during this process.
After that, install the water heater and bath. Once installed, you can cover it with the Ceiling for a neater look. This not only improves aesthetics but also protects the unit from damage.
Finally, after cleaning up the mess, lay the wooden floors and bring in the furniture. A clean environment is essential to prevent dust from settling on new surfaces.
Lastly, remember that some renovation materials may emit a strong odor after completion. It's important to let the house air out for at least three months before moving in. During this time, continue cleaning and maintaining the space to ensure a healthy living environment.
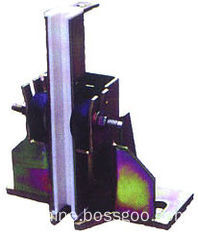
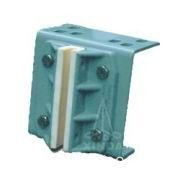
Elevator Guide Shoe
- elevator shoes,
- elevator guide shoe,
- elevator slipper guide shoes
- elevator door guide shoes /slide shoes
- Rated Speed≤2.5m/s
- Width of guide rails B1 10,16mm
product
- Elevator Guide Shoe , 16mm Width Of Guide Rails PB233
- Slipper Elevator Guide Shoe , Rated Speed≤2m/s
- Elevator Guide Shoe , Width Of Guide Rails B1 10 ,16mm PB229
- Slipper Elevator Guide Shoe For Elevator Door , PB231
- Car / Elevator Guide Shoe ,≤2m/s Rated Speed PB177K
- Slide Elevator Guide Shoe ,16mm Width Of Guide Rails PB234


Elevator Guide Shoe, Slide Elevator Guide Shoe, Slipper Elevator Guide Shoe
Ningbo Xinda Elevator Traction Technology Co., Ltd. , https://www.xinda-elevator.com